

Installation is easy process and it will not take long. Follow the steps below.
1) Download the zip file from here
2) Get a hosting, 90% of the hosting have Cpanel.
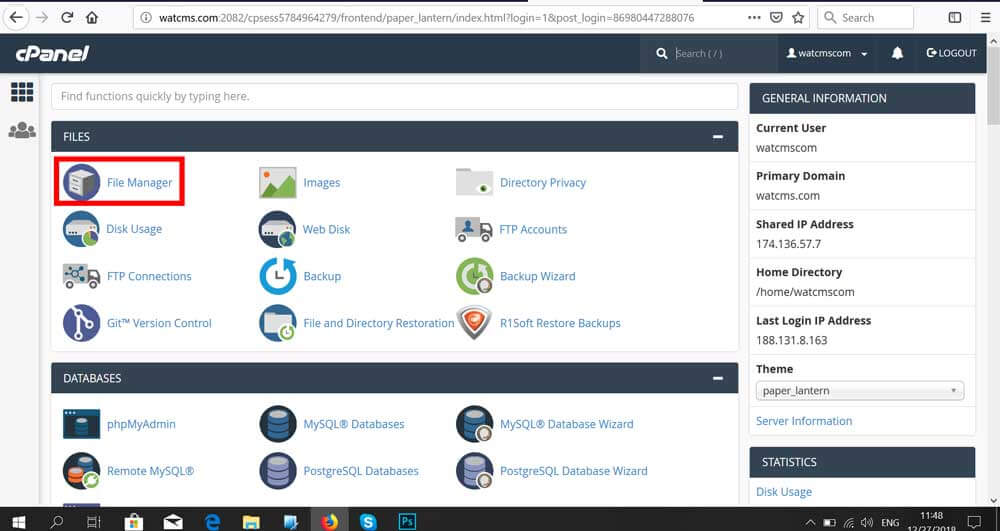
3) Open Cpanel www.yourwensite.com/cpanel
4) Press on File Manager
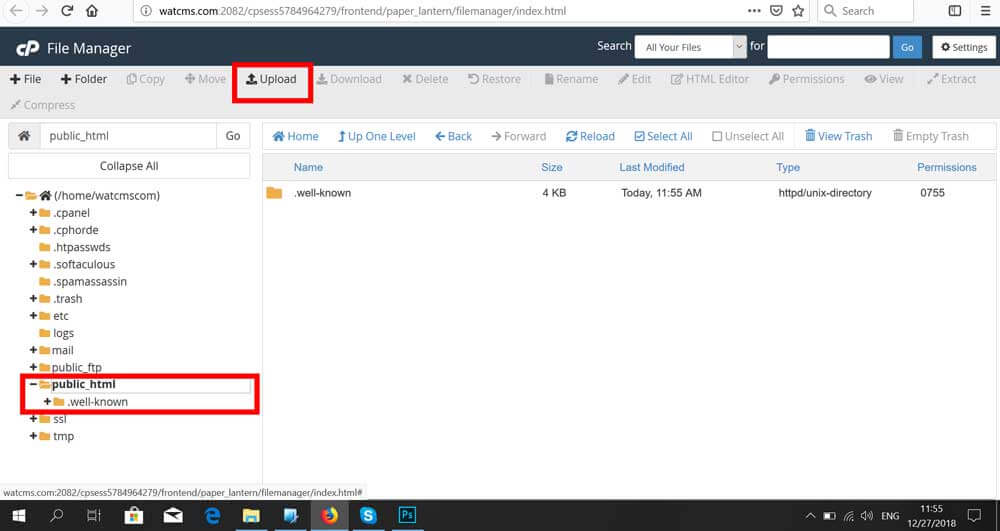
5) On the left side you will see the folders structure, find the folder public_html and press on it, after press on the top the button Upload
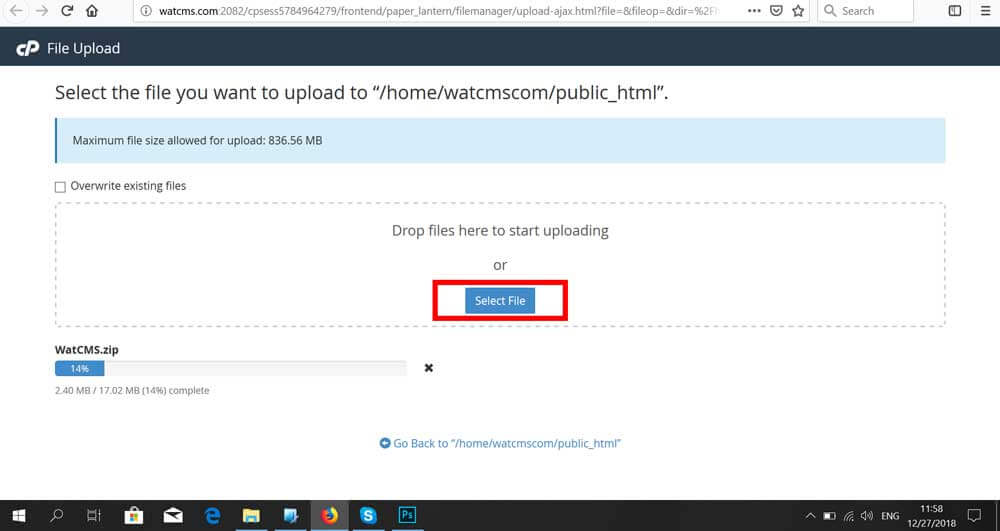
6) Select the zip file Ecommercecms.org_3.4.zip and wait until the upload is 100%
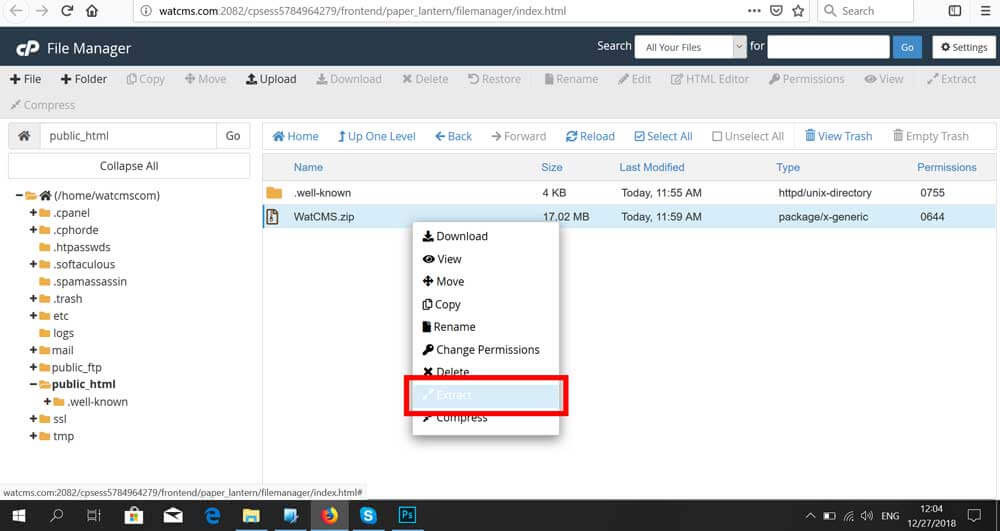
7) Go back to File Manager and refresh the page, after on the list click right click on file WatCMS.zip and select Extract. Wait until the extract is done.
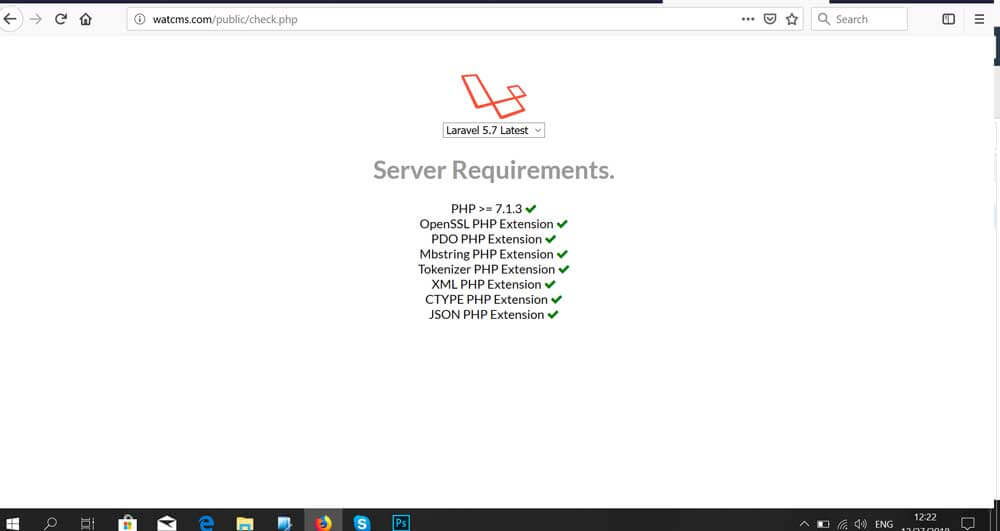
8) Access the link www.yourwebsite.com/public/check.php to check if your hosting meet all the requirements for the EcommerceCMS, if all ok you should see all the points green
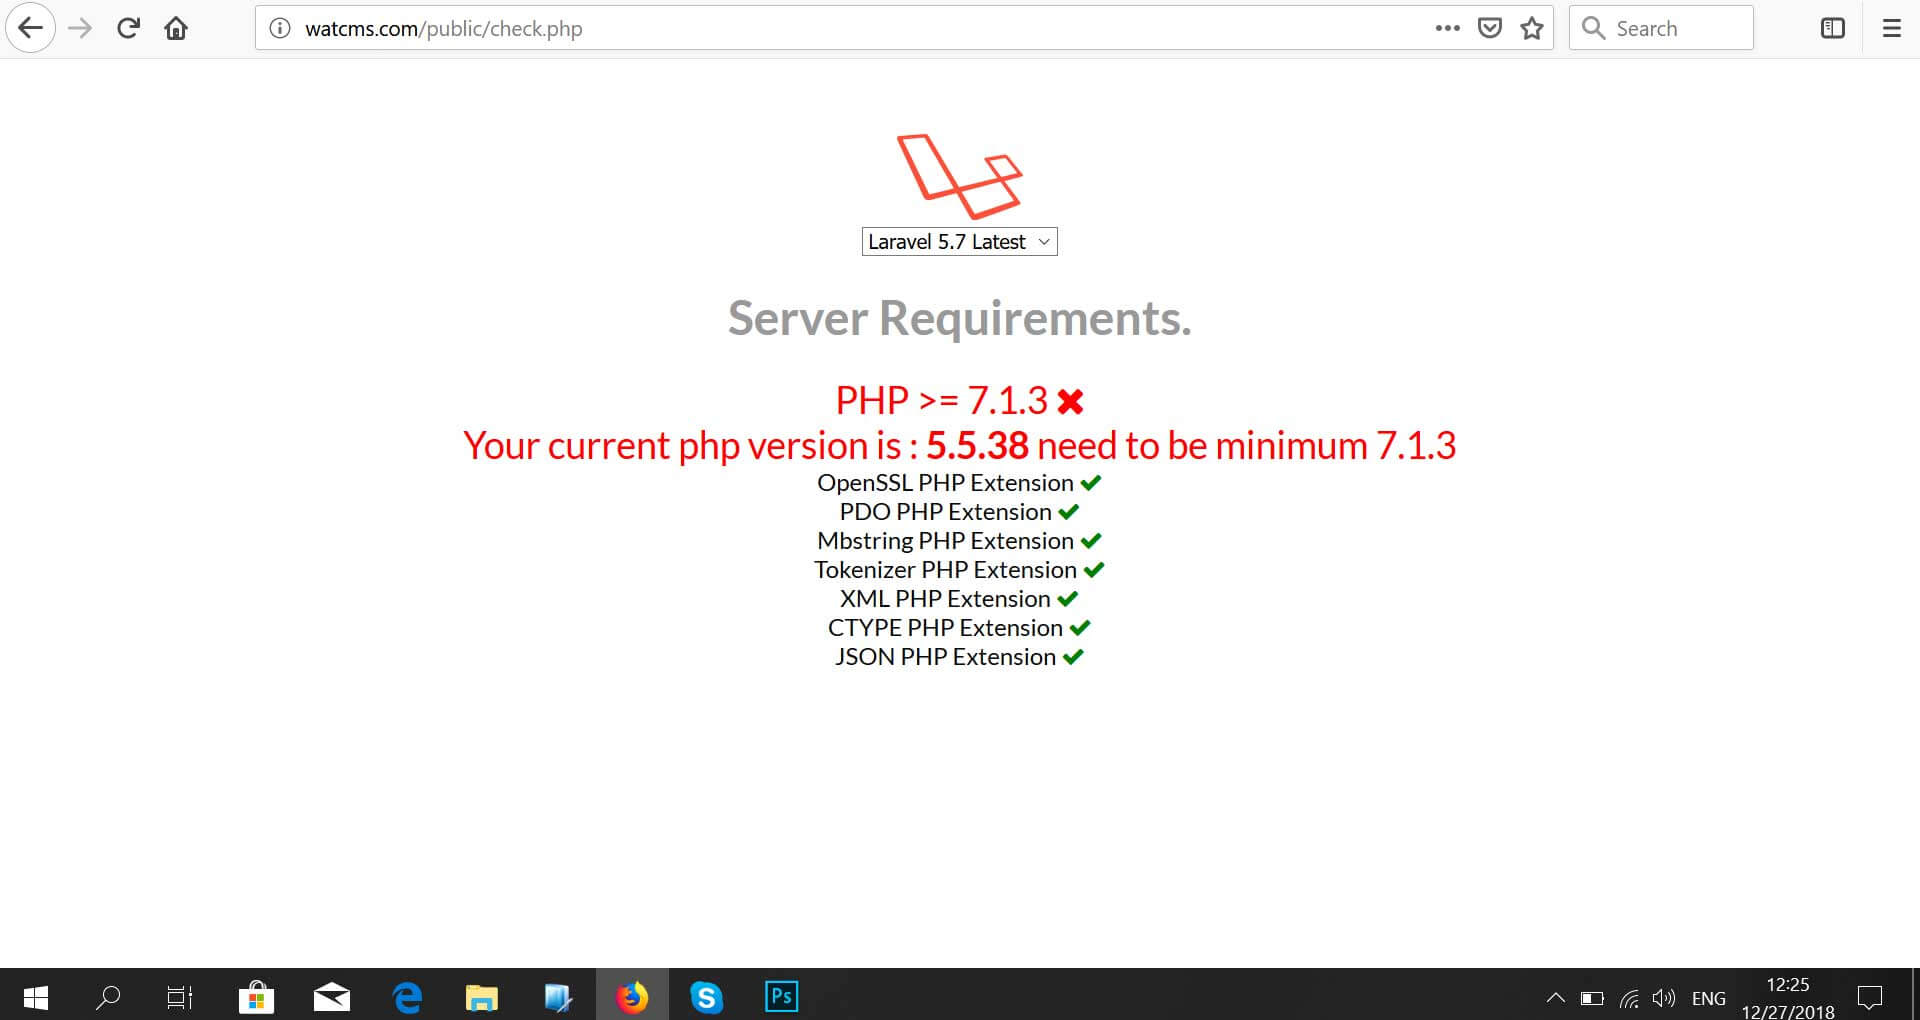
8.1) If you see an error like below follow the steps on point 8.2, if all ok skip to point 9
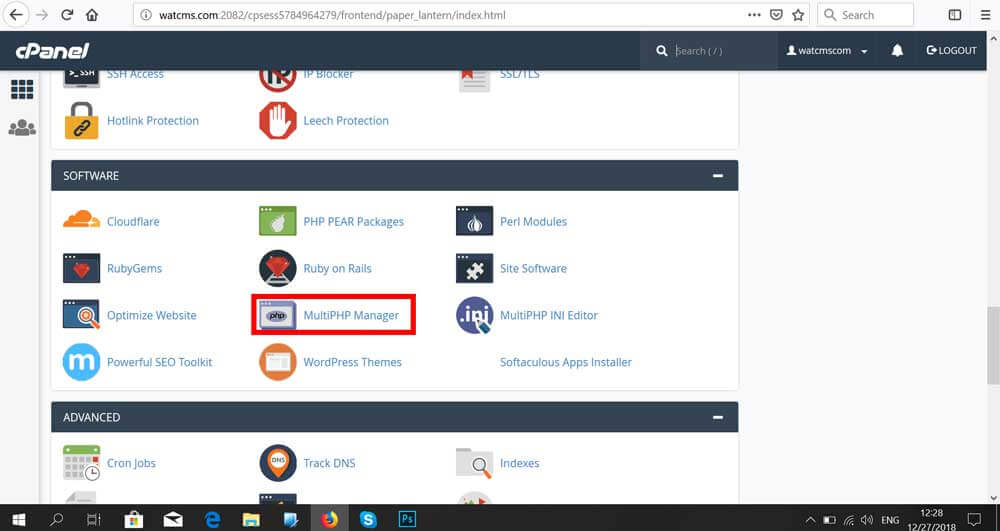
8.2) Go to Cpanel and access MultiPHP Manager( if you not find the MultiPHP Manager, ask your hosting support where you can change the version of PHP to 7.2 minim, or ask them to do this :) )
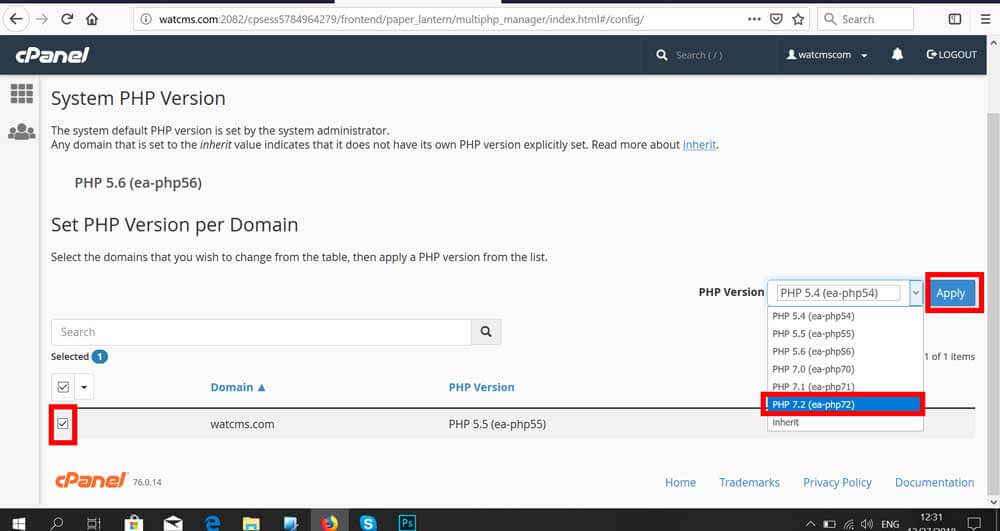
8.3) Find the website name in the list, and check the checkox next to website; Select from dropdown the last version of php in my case is PHP 7.2; And press the button Apply and check again if the error disappear. Now should be all right.
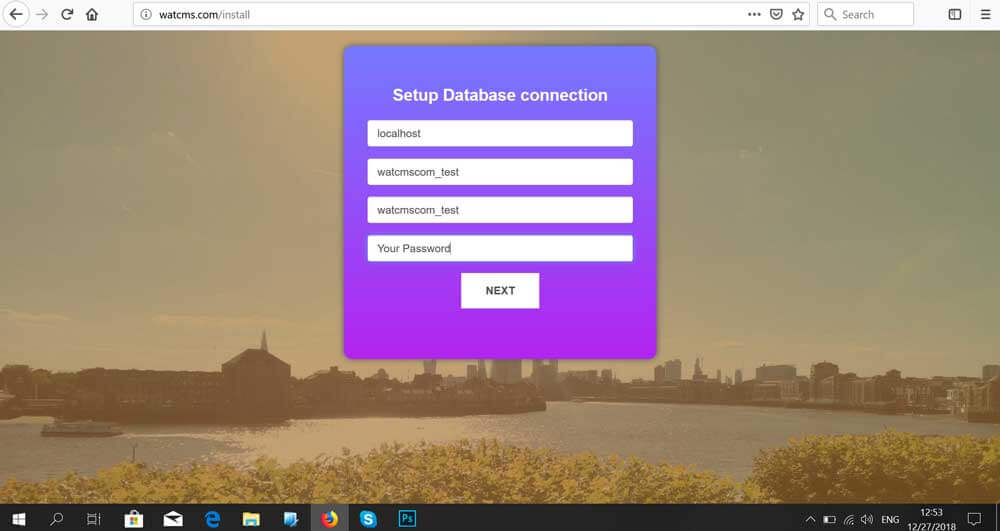
9) Go to your website home page www.yourwebsite.com/ you should get redirected to www.yourwebsite.com/install where you should enter your database name, database username, database password
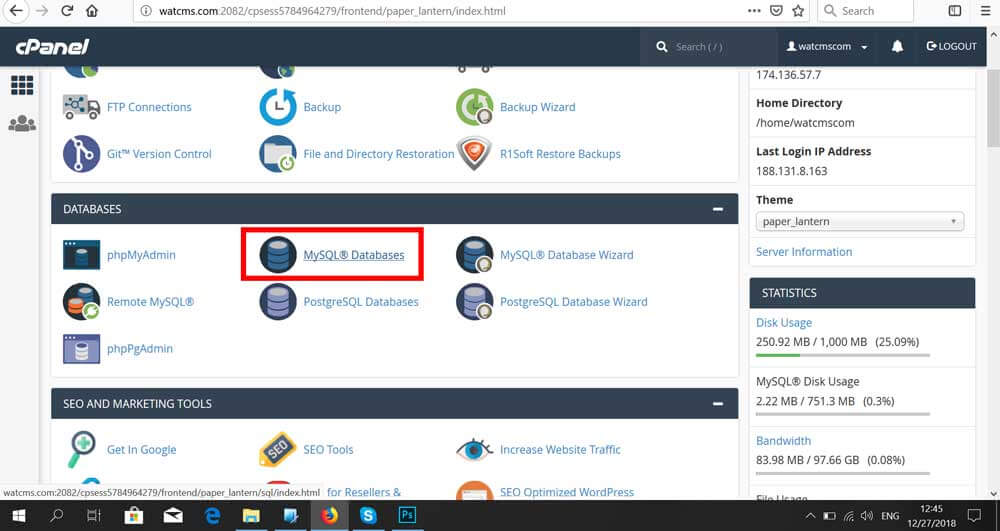
10) How to create a database: Go to CPanel and access Mysql Databases
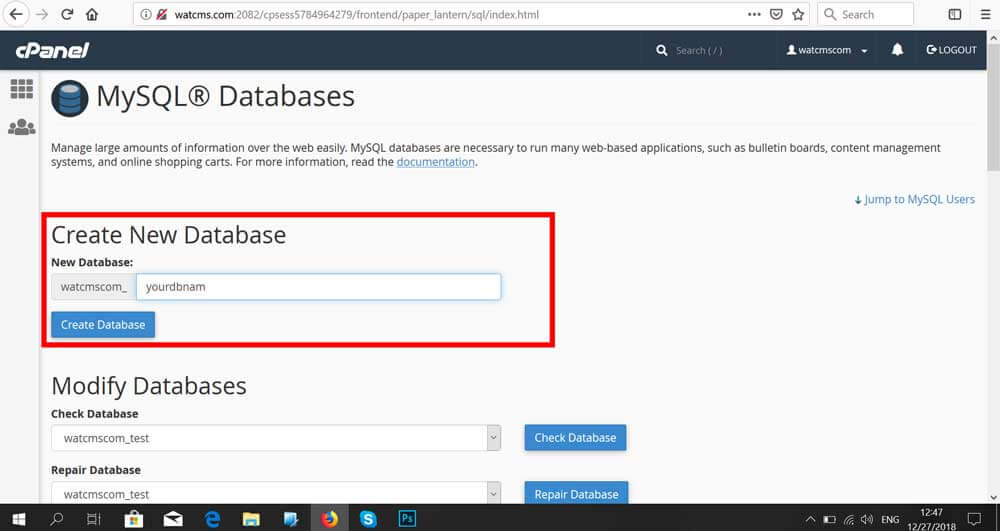
10) After find a sections "Create New Database" and enter your database name, any name
11) On the same page page find Add new User Sections and add new user, keep the user name and password
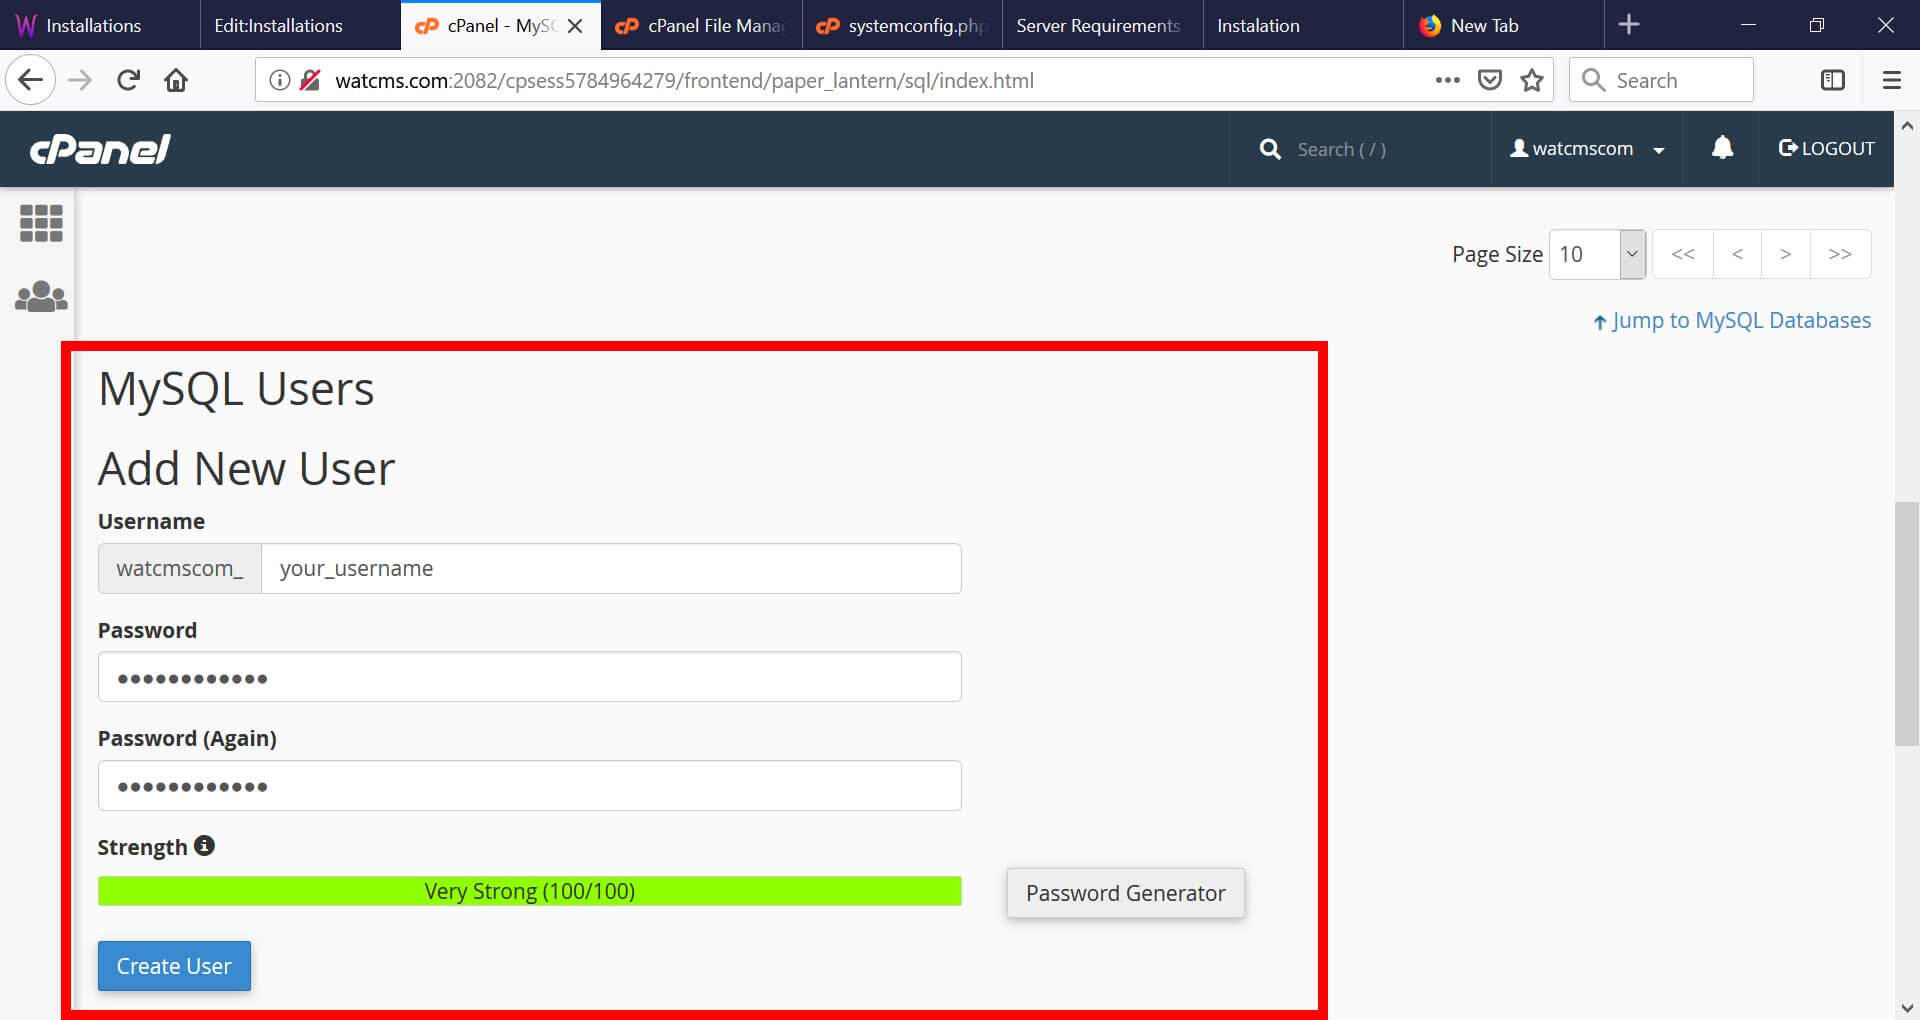
12) On the next page Check all the boxes
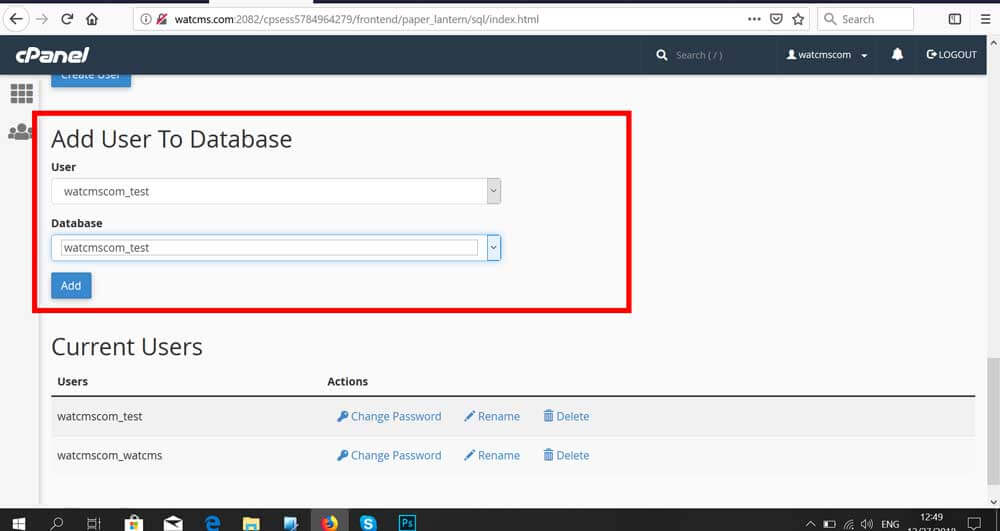
13) Link the user with database On the same page find the sections Add user to database
14) Go to installation page and enter your details and press next
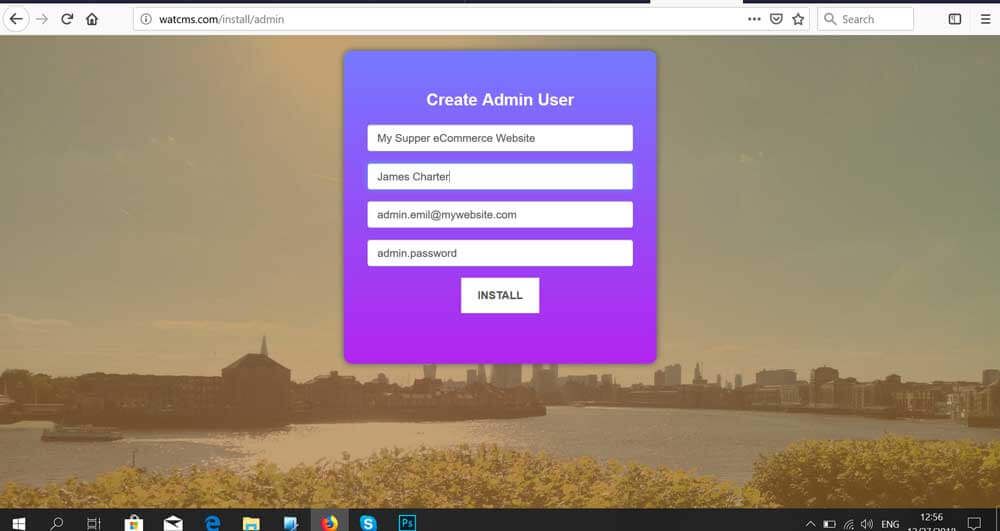
15) Next page create an Admin User
16 ) All done!!!